Ever looked at a stylish watch and thought, “I wonder how that’s put together?” Or perhaps you’ve dreamt of owning a unique watch that perfectly reflects your style, without breaking the bank? Well, wonder no more! Building your own watch is not as daunting or expensive as you might think. In fact, with readily available parts and a little patience, you can assemble a custom timepiece for around £100.
This guide will walk you through the basic process of building your own watch, drawing inspiration from enthusiasts who have successfully embarked on this rewarding journey. You too can experience the satisfaction of wearing a watch that you personally crafted.
Why Build Your Own Watch?
- Affordability: You can create a stylish watch for a fraction of the cost of a comparable retail model.
- Customisation: Choose every component to match your personal taste, creating a truly unique watch.
- Sense of Accomplishment: There’s immense pride in being able to say, “I made this myself!”. It’s a fantastic conversation starter.
- Understanding Horology: You’ll gain a deeper appreciation for the intricate mechanics and craftsmanship involved in watchmaking.
Getting Started: The Essential Parts You’ll Need
Before you can begin assembling your dream watch, you’ll need to gather the necessary components. Most parts can be sourced online from various marketplaces. Here’s a breakdown of the key items:
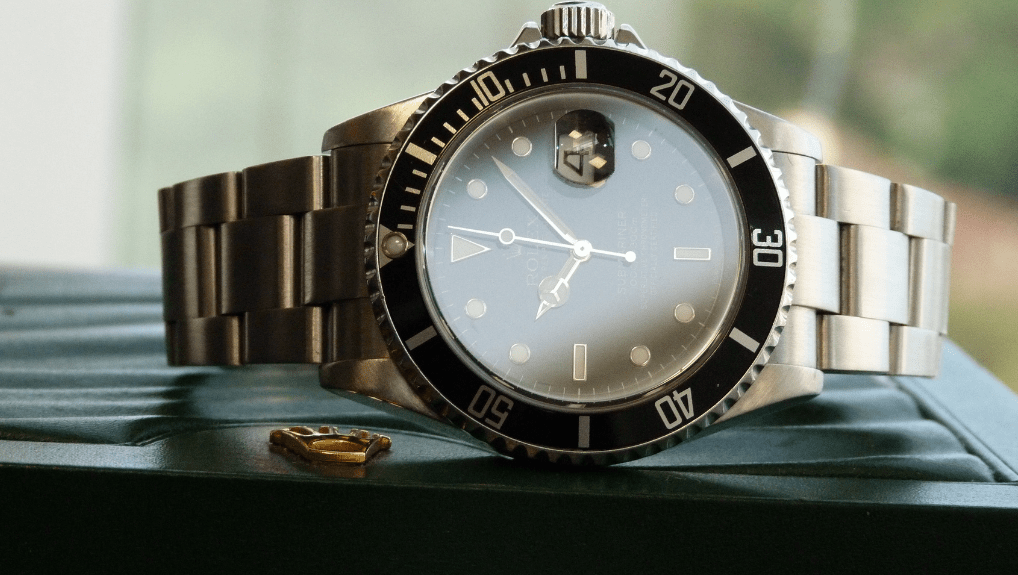
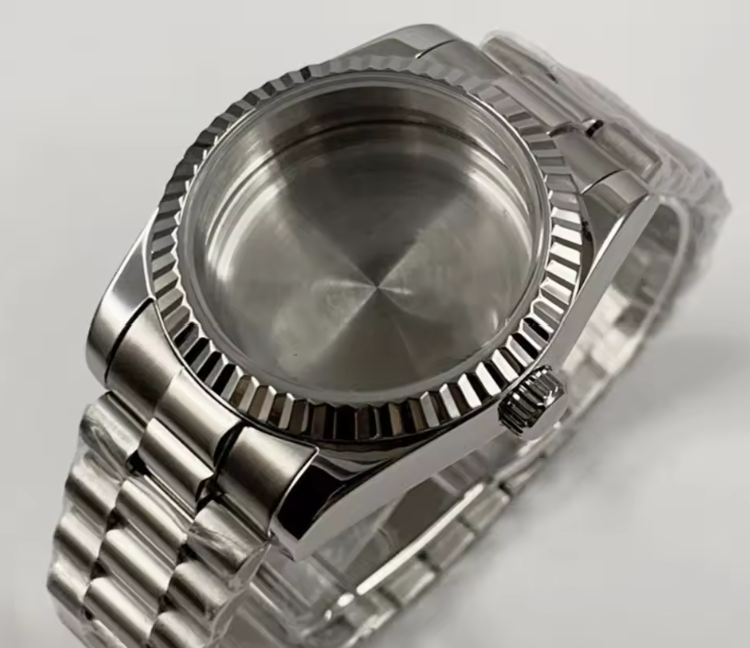
- Watch Case: This is the housing for the movement and other components. Cases come in various styles, sizes, and materials. Some even have exhibition case backs allowing you to see the movement.


🔗Click & Buy: https://s.click.aliexpress.com/e/_olLS7oR
🔗Click & Buy: https://s.click.aliexpress.com/e/_on6BKM3
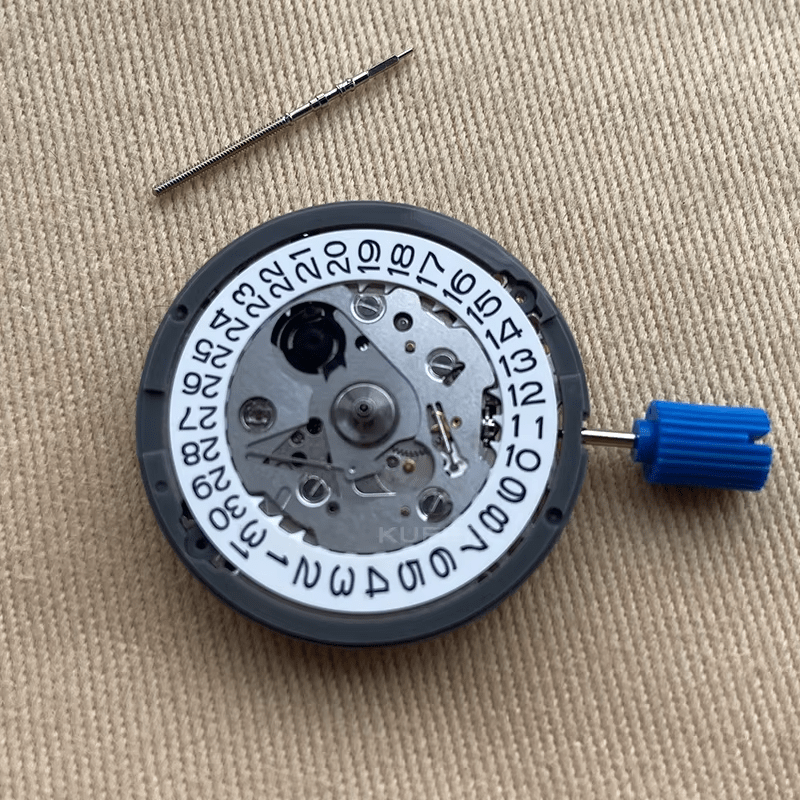
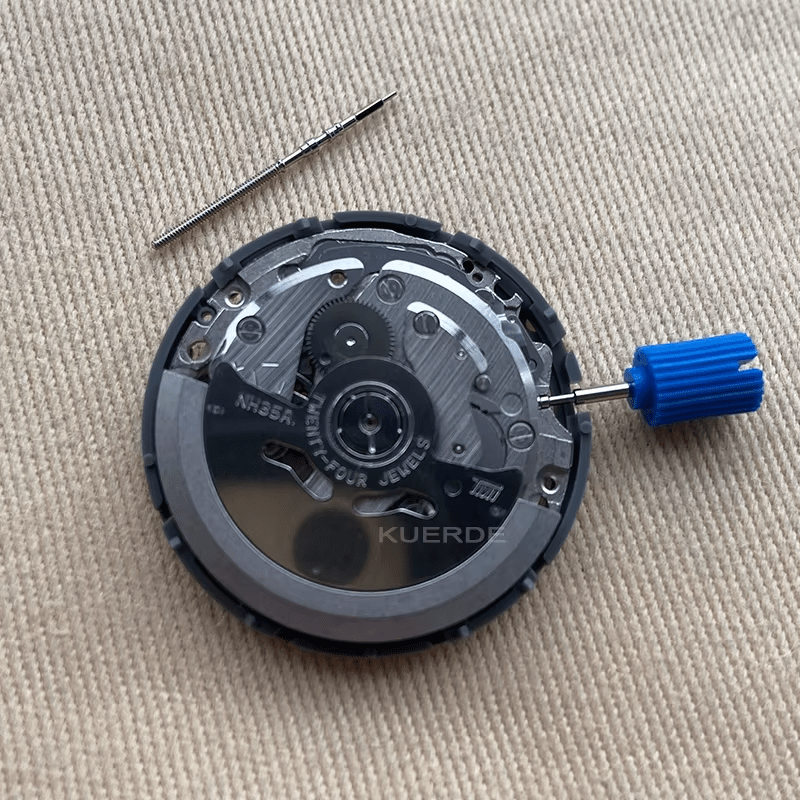
- Watch Movement: This is the heart of the watch, providing the power and keeping time. Popular choices include Seiko movements like the NH35 (with date) or NH34 (GMT function). Ensure the movement type matches the dial and hand compatibility.
🔗Click & Buy: https://s.click.aliexpress.com/e/_oCSu6sb
- Watch Dial: This is the face of the watch, displaying the time. Dials come in numerous designs, colours, and with different indices. Make sure it’s compatible with your chosen movement (e.g., date window alignment).


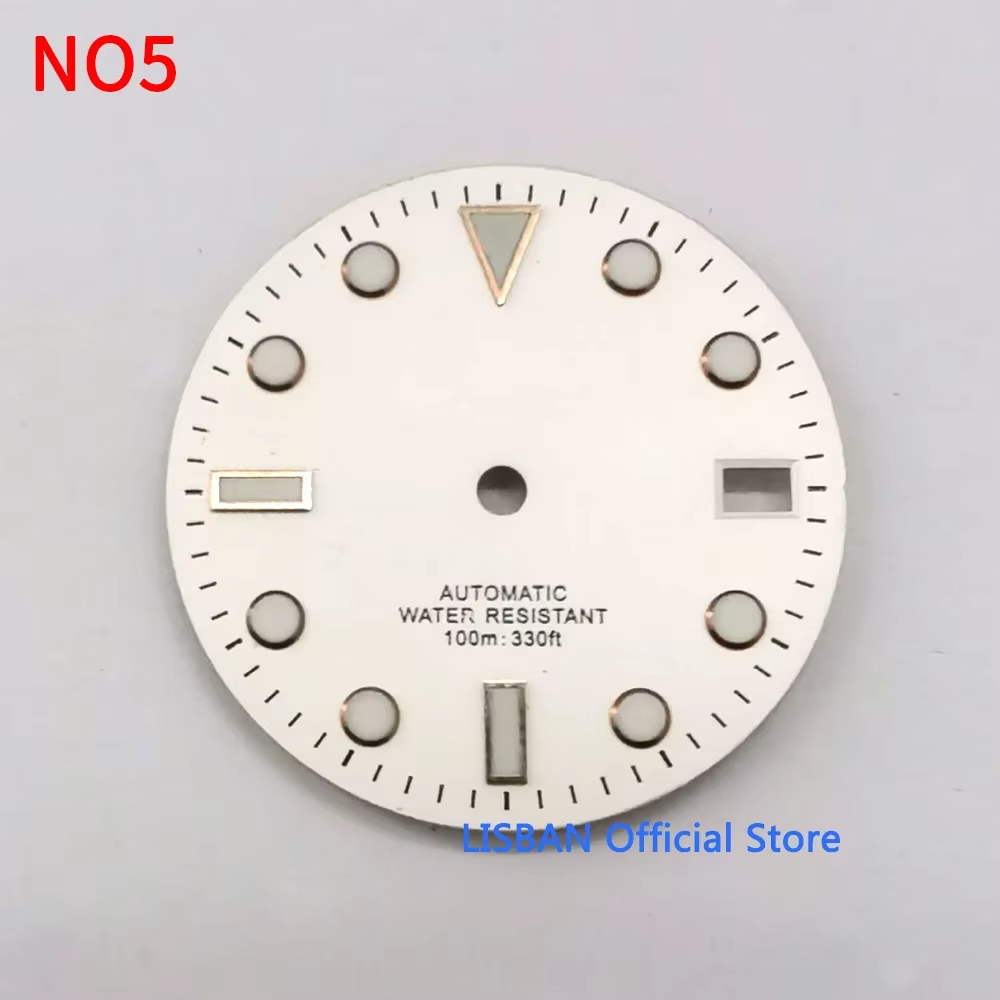
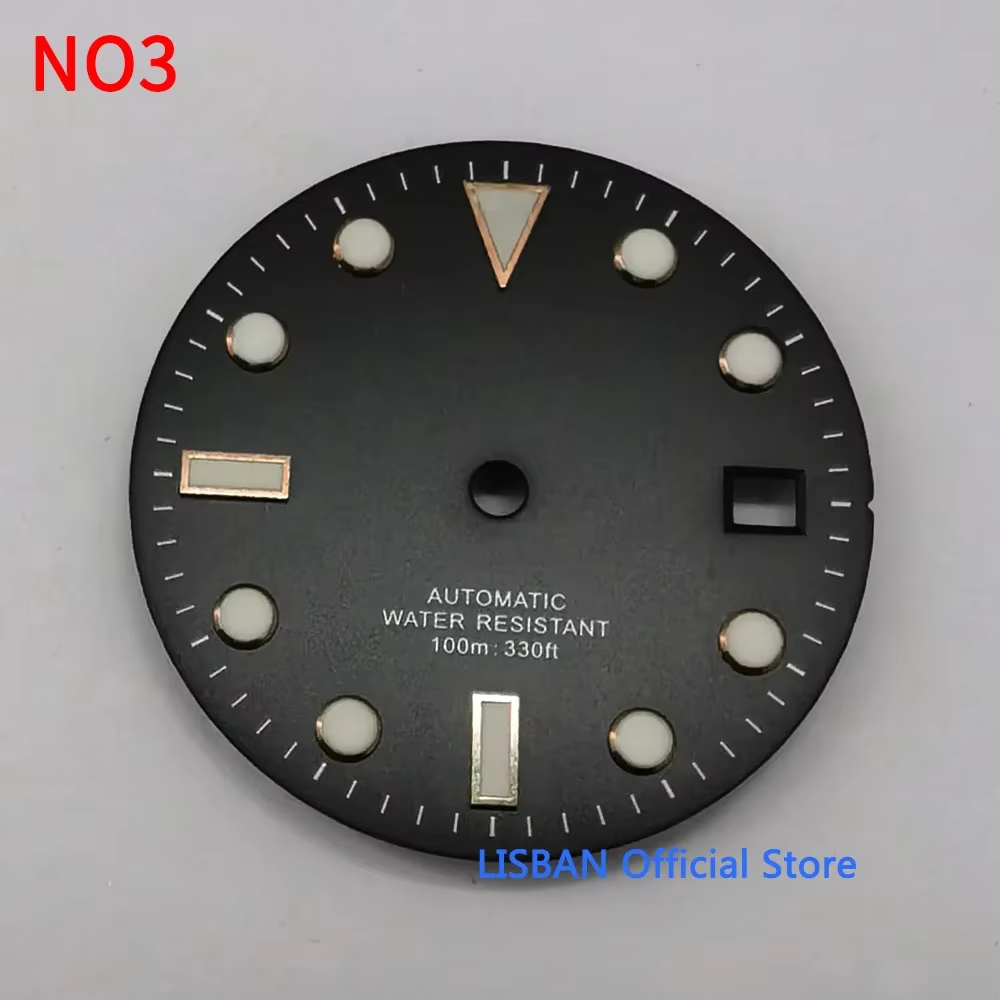
🔗Click & Buy: https://s.click.aliexpress.com/e/_onJDUhH
🔗Click & Buy: https://s.click.aliexpress.com/e/_oBwlGir
- Watch Hands: You’ll need a set of hour, minute, and second hands that are compatible with your movement. Some builds might also include a GMT hand. You can choose different styles and colours to match your dial.

🔗Click & Buy: https://s.click.aliexpress.com/e/_ommYtor
- Case Back Gasket (O-ring): This rubber seal helps to provide water resistance. It’s important to keep it lubricated.
- Custom wheel (Optional): 🔗Click & Buy: https://s.click.aliexpress.com/e/_onQzzkX
🔗Click & Buy: https://s.click.aliexpress.com/e/_oDgNt5v
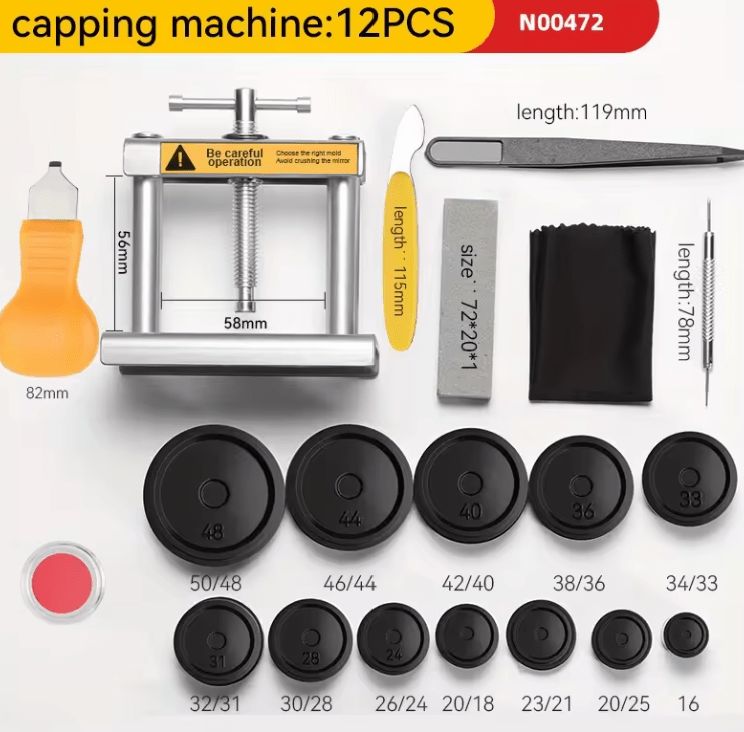
- Tools: You’ll need a few basic tools to assemble your watch. A starter kit can often be purchased for around 10 bucks. Essential tools include:
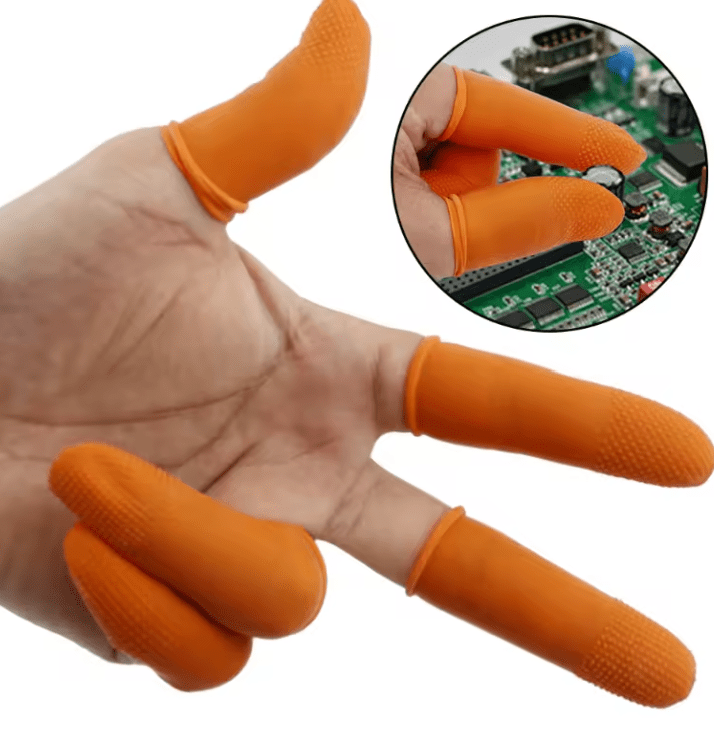
- Finger Cots or Gloves: To keep your hands clean and prevent oils and fingerprints from damaging the delicate parts. 🔗Click & Buy: https://s.click.aliexpress.com/e/_ol6JBFN
- Kit 1: 🔗Click & Buy: https://s.click.aliexpress.com/e/_oksn7V1
- Kit 2: 🔗Click & Buy: https://s.click.aliexpress.com/e/_ootB9wb
- Kit 3 (higher quality): 🔗Click & Buy: https://s.click.aliexpress.com/e/_omm1qlV
- Tweezers: For handling small components like hands. In Kit.
- Hand Pressing Tools: These are used to carefully push the hands onto the movement. A set with different sizes is recommended. In kit.
- Watch Face/Dial Protector: A soft pad to work on and protect the dial. 🔗Click & Buy: https://s.click.aliexpress.com/e/_oEiNJCX
- Case Opener Tool: A rubber ball can provide enough friction to open and close screw-back cases. 🔗Click & Buy: https://s.click.aliexpress.com/e/_okB8XQx
- Gasket Lubricant: To keep the case back gasket supple.
- Movement Holder: To securely hold the movement while working on it. 🔗Click & Buy: https://s.click.aliexpress.com/e/_onnKFUr
- Small Screwdrivers: For removing bracelet links if using a metal bracelet. In Kit.
- Rodico (Watchmaker’s Putty) (Optional): Useful for picking up and positioning hands without scratching them. 🔗Click & Buy: https://s.click.aliexpress.com/e/_oBJZA0L
- Movement Spring (Case Spring): Some cases use a spring to hold the movement securely in place.

The Assembly Process: Step-by-Step
While the exact order might vary slightly depending on your components, here’s a general overview of the watch building process:
- Prepare Your Workspace: Choose a clean, well-lit area. Use a watch face protector to avoid scratching the dial.
- Fit the Dial: Carefully align the dial with the movement. Some dials have small pins (dial feet) that fit into corresponding holes on the movement. You might need to remove redundant dial feet if they don’t match your movement. Ensure the dial is seated correctly and dust-free.
- Set the Initial Time (Midnight): Before attaching the hands, it’s often recommended to advance the movement to midnight, indicated by the date changing over (if your movement has a date function). This helps ensure the hands are correctly aligned.
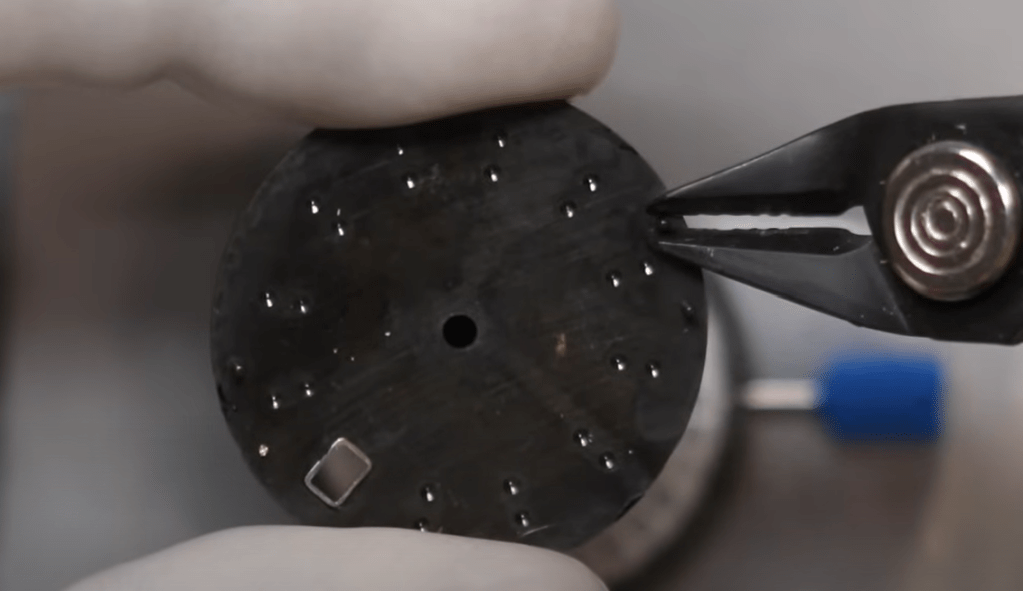
- Attach the Hands: This is a delicate step. Start with the hour hand, then the minute hand, and finally the second hand. If your movement has a GMT function, that hand is also fitted. Use the hand pressing tools to gently push each hand onto its respective pinion. Ensure the hands don’t touch each other as they rotate. This step can be tricky and might require patience.
- Insert the Movement into the Case: Carefully place the assembled movement (with the dial and hands attached) into the watch case. Ensure it sits securely. Some cases use a movement spring to hold it in place.
- Install and Trim the Crown Stem:
- If your movement came with a temporary stem, remove it by pressing a small release lever on the movement while gently pulling the stem out.
- Screw the crown onto the new stem.
- Insert the stem and crown into the case and movement.
- Mark the stem where it needs to be trimmed so the crown sits correctly against the case without protruding too far. It’s better to cut off too little initially and trim more if needed. Calipers can help with accurate measurement.
- Carefully cut the stem using a stem cutting tool.
- Smooth the cut end with fine sandpaper or a file.
- Reinsert the trimmed stem and ensure the crown functions correctly for winding and setting the time/date.
- Lubricate the Case Back Gasket: Apply a small amount of gasket lubricant to the O-ring on the case back. This helps maintain a good seal.
- Close the Case Back: Align the case back and screw it down using the rubber ball or a suitable case back tool. Ensure it’s snug but not overtightened.
- Attach the Strap or Bracelet: Fit your chosen strap or bracelet to the watch case using spring bars. If using a metal bracelet, you may need to adjust the links to fit your wrist.
Final Touches and Enjoying Your Creation
Once your watch is assembled, take a moment to admire your handiwork. Set the time and date correctly. Wear your unique timepiece with pride, knowing that you brought it to life.


Building your own watch is a fulfilling and educational experience. While it might seem intricate at first, with the right parts, tools, and a bit of care, you can create a watch that is uniquely yours and a testament to your personal style. Happy building!

Leave a comment